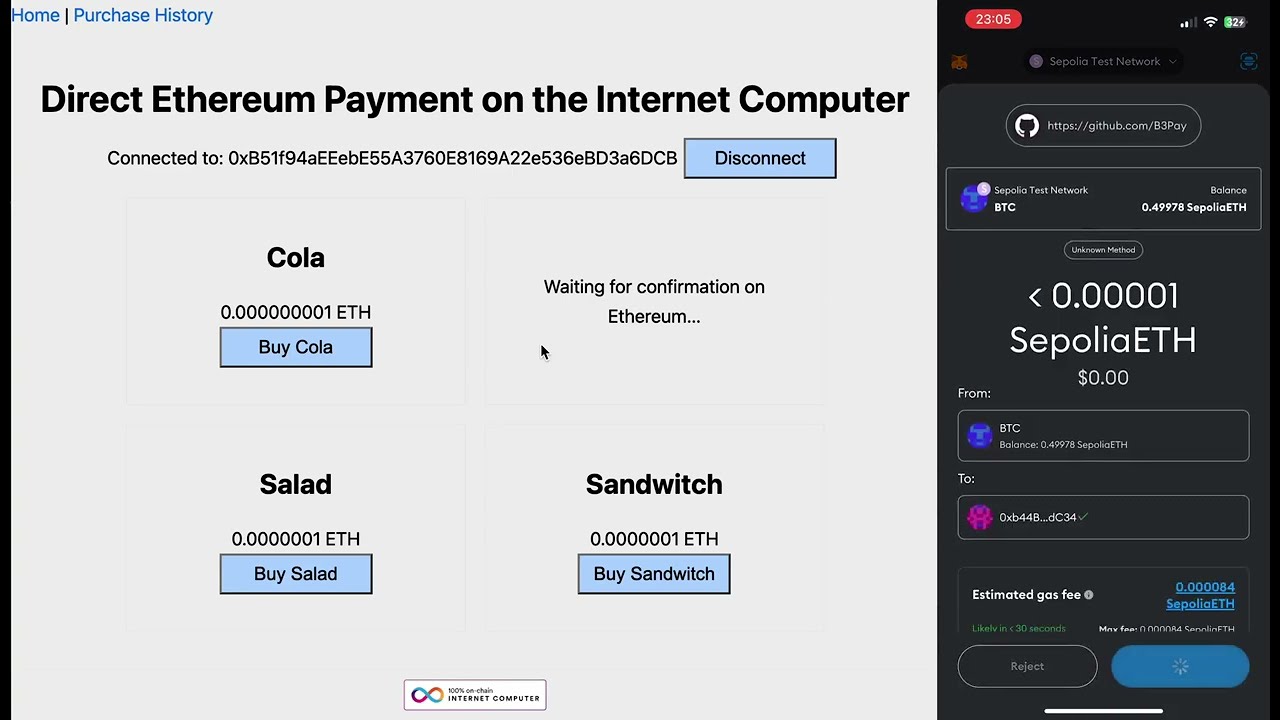
Step 13: Frontend Integration for Shop and Item Purchase
In this step, we’ll integrate the frontend to display a shop and handle item purchases.
Shop Component
Create a new file Shop.tsx inside the src/components directory and add the following code:
import { useEffect } from "react"
import { useActorMethod } from "service/hello"
import Item from "./Item"

interface ShopProps {}

const Shop: React.FC<ShopProps> = ({}) => {
  const { data: items, loading, call } = useActorMethod("get_items")

  useEffect(() => {
    call()
  }, [])

  return (
    <div
      style={{
        marginTop: 10,
        display: "grid",
        gridTemplateColumns: "repeat(2, 1fr)",
        gridGap: 20,
      }}
    >
      {loading ? (
        <div>Loading...</div>
      ) : (
        items?.map(([name, price]) => {
          return <Item name={name} price={price} key={name} />
        })
      )}
    </div>
  )
}

export default Shop
This component fetches the list of items from the backend and displays them in a grid layout.
Item Component
Create a new file Item.tsx inside the src/components directory and add the following code:
import { useEffect } from "react"
import helperAbi from "service/abi.json"
import { useActorMethod } from "service/hello"
import { formatEther } from "viem"
import { useContractWrite } from "wagmi"
import Confirmation from "./Confirmation"

interface ItemProps {
  name: string
  price: bigint
}

const Item: React.FC<ItemProps> = ({ name, price }) => {
  const { data: canisterDepositAddress, call } = useActorMethod(
    "canister_deposit_principal"
  )

  useEffect(() => {
    call()
  }, [])

  const { data, isLoading, write } = useContractWrite({
    address: "0xb44B5e756A894775FC32EDdf3314Bb1B1944dC34",
    abi: helperAbi,
    functionName: "deposit",
    value: price,
    args: [canisterDepositAddress]
  })

  if (isLoading) {
    return <div>Buying {name}…</div>
  } else if (data?.hash) {
    return <Confirmation hash={data.hash} item={name} />
  } else {
    return (
      <div>
        <h3>{name}</h3>
        <div>{formatEther(price).toString()} ETH</div>
        <button onClick={() => write()}>Buy {name}</button>
      </div>
    )
  }
}

export default Item
This component handles the purchase of individual items. It uses the canister_deposit_principal and deposit methods to handle the transaction.
Confirmation Component
Edit the existing Confirmation.tsx file to add the item prop:
import { Hash } from "viem"
import { useWaitForTransaction } from "wagmi"
import VerifyTransaction from "./VerifyTransaction"

interface ConfirmationProps {
  item: string
  hash: Hash
}

const Confirmation: React.FC<ConfirmationProps> = ({ item, hash }) => {
  const { data, isError, error, isLoading } = useWaitForTransaction({
    hash,
    confirmations: 6
  })

  if (isError && error) {
    return <div>Transaction error {error.toString()}</div>
  } else if (isLoading) {
    return <div>Waiting for confirmation on Ethereum…</div>
  } else if (data) {
    return <VerifyTransaction hash={data.transactionHash} item={item} />
  } else {
    return null
  }
}

export default Confirmation
This component waits for the Ethereum transaction to be confirmed and then triggers the on-chain verification on the Internet Computer.
Verify Transaction Component
Edit the existing VerifyTransaction.tsx file to add the item prop and work with the new buy_item method:
import { useEffect } from "react"
import { useActorMethod } from "service/hello"

interface VerifyTransactionProps {
  item: string
  hash: string
}

const VerifyTransaction: React.FC<VerifyTransactionProps> = ({
  item,
  hash
}) => {
  const { loading, error, data, call } = useActorMethod("buy_item")

  useEffect(() => {
    call(item, hash)
  }, [hash])

  if (loading) {
    return <div>Processing Purchase on ICP...</div>
  } else if (error) {
    return <div>{error.toString()}</div>
  } else if (data) {
    return (
      <div>
        <h3>{item} bought!</h3>
        <div>Purchase ID: {data.toString()}</div>
      </div>
    )
  } else {
    return null
  }
}

export default VerifyTransaction
This component calls the buy_item method on the backend to finalize the purchase and display a purchase ID.
Update Wallet Component
In your Wallet.tsx, replace <Deposit /> with <Shop />.
Testing
-
Local Testing: Run yarn dev to test the application locally.
-
Deploy to Mainnet: Run yarn deploy --network=ic to deploy the application to the Internet Computer mainnet.
-
Live Example: The live example can be accessed at https://uu4vt-kqaaa-aaaap-abmia-cai.icp0.io/.
Thank you for taking the time to explore this tutorial. I hope it serves as a helpful starting point for your journey into the Internet Computer ecosystem. If you’d like to dive deeper, you can clone the project and test it out yourself. Here’s the GitHub repository for direct cloning: eth_payment_tutorial.
Happy coding!


